In this tutorial we would simulate foreground water similar to the ones we see in many platformers. This shader is written in OpenGL Shading Language, so they can be applied in all environments using OpenGL for rendering and for DirectX it has be changed a bit but basic concept would remain the same.
At the end you can find the link of the source code for project implementing GLSL in Libgdx. Here is the video of final output.
Brief Introduction to Shaders:
We would just go through some basics of shaders. There are two shaders in graphics pipeline – vertex and fragment shader.
Vertex Shader: – As the name implies, it works on a vertex, one vertex at a time. For each input vertex we get one output vertex. It contains user defined information like Position, Normal and Texture Coordinates (to tell which part of the texture to be mapped to that vertex). This shader at some point has to define gl_Position (a 4D vector) which is the output position of vertex on the screen.
Fragment Shader: – Vertex shader outputs the final position of the vertex for the output screen. Now Fragment Shader’s task is to set or discard gl_FragColor, the colour of the pixel to be output on the screen. For example discarding is done when we are drawing only front facing meshes in a 3D environment.
Shader Variable Types: –
Attribute: – This is for vertex shaders. It is used to apply values to individual vertices.
Uniforms: – Applied to both Vertex and Fragment shader. Its value does not change during the frame.
Varying: – This is used to share data of the Vertex Shader with the Fragment Shader.
Shader for Game Data
Now we would first make vertex and fragment shaders to render the contents of the game which would be default in many development environments usually rendering the data without any effect.
Vertex Shader:
[sourcecode]
attribute vec4 a_position;
attribute vec2 a_texCoord0;
uniform mat4 u_worldView;
varying vec4 v_color;
varying vec2 v_texCoords;
void main () {
v_color = vec4 (1, 1, 1, 1);
v_texCoords = a_texCoord0;
gl_Position = u_worldView * a_position;
}
[/sourcecode]
u_worldView would be used to set the world matrix (view and projection matrix combined).
a_position is the position of vertex being passed into the shader.
gl_Position has then the position of the vertex (a_position) by multiplying it with the world matrix so it transforms to the final view matrix.
v_texCoords and v_color would be used to pass information of texture and colour. In this case colour being passed for vertex is white colour to the fragment shader.
Basic Fragment Shader:
[sourcecode]
#ifdef GL_ES
precision mediump float;
#endif
varying vec2 v_texCoords;
uniform sampler2D u_texture;
void main ()
{
gl_FragColor = v_color * texture2D (u_texture, v_texCoords);
}
[/sourcecode]
Using this fragment shader we will be able to show the texture, as it is, on the screen. Initially we check if GL_ES is available to set precision of float to medium as by default it is set to low precision.
v_color is passed from vertex shader and in this case it is just white colour (you can change the colour to give different feel to content for e.g. gray colour would make everything look dark).
texture2D function takes u_texture, the index of the texture which along with v_texCoords, passed from vertex shader, is used to get colour of the pixel from texture. By multiplying with v_color we get our final colour.
So here is the image with the background.

Now we add water. Here is the image of water we would use.

Here is Water using default shader:
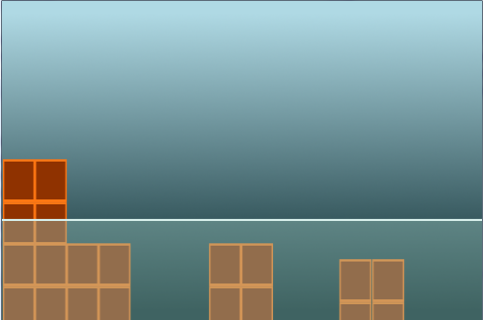
To add water effect we would create a new Fragment shader for it. We can reuse the old vertex shader as we won’t be modifying anything in there. The water we are going to make here would be just one rectangular mesh (like a sprite) whose top surface would show distortion similar to water. But if we wanted reactive water with ripples depending on object interaction then we would have to add vertices to the water mesh and change vertex position depending on the position where the ripple should start.
Water Fragment Shader:-
[sourcecode]
#ifdef GL_ES
precision medimp float;
endif
varying vec4 v_color;
varying vec2 v_texcoords;
uniform sampler2D u_texture;
uniform sampler2D u_texture_displacement;
uniform float timedelta;
void main (){
vec2 displacement=texture2D (u_texture_displacement, v_texCoords/6.0).xy;
float t= v_texCoords.y + displacement.y *0.1-0.15+ (sin (v_texCoords.x * 60.0+timedelta) * 0.005);
gl_FragColor = v_color * texture2D (u_texture, vec2 (v_texCoords.x, t));
}
[/sourcecode]
In this shader we would be passing index of water image in u_texture and displacement image in u_texture_displacement (to randomize the movement of water surface). The displacement image is just a texture with random noise in it. To simulate water we would move pixels in texture in sine wave form. Then add displacement to make the wave uneven. This will all happen inside the area of the texture.
Displacement Texture Used:
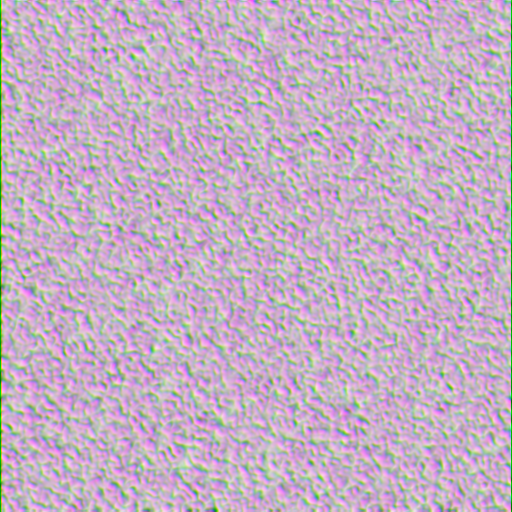
Here is an image which explains the sine wave.
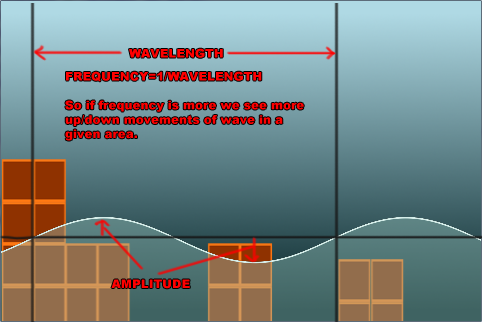
To make the waves move we pass a value called timedelta from code to give the effect of flowing water. The value is calculated every frame and is such that it goes from 0 to 360 degrees over a period of time and then resets to 0 and starts again. This timedelta is used to change the angle argument of sine wave on every frame which changes the pixel position giving the feel of moving water.
For e.g. if a player is moving fast we can increase the change in value of timedelta over a frame to make the wave oscillations happen faster adding to the impression of the faster movement of the player. Also bigger amplitude of the wave would give a feel of more turbulent water.
As you can see in the snippet (texture2D (u_texture, vec2 (v_texCoords.x, t))) that X coordinate is reused as it is, passed from vertex shader. And Y coordinate of the texture is changed to give the water effect.
60.0 is the frequency of the wave for this example. 0.005 is the value of amplitude used for the sine wave. The value (displacement.y*0.1-0.15) gives randomness to the sine wave. You can change all these values to get a satisfactory result. We can pass frequency and amplitude from the code also and change it during the game also rather than defining them in the shader code itself.
So in short first we take the position of distortion texture coordinate in first line. Then we calculate new y coordinate of the texture using displacement texture and sine function. The x coordinate of texture would remain same. It is just y coordinate of the pixel goes up and down.
Here are the results:-
Output without using displacement texture and sine wave with amplitude of 0.05 instead of final 0.005 (so that the wave is easily visible in the image).
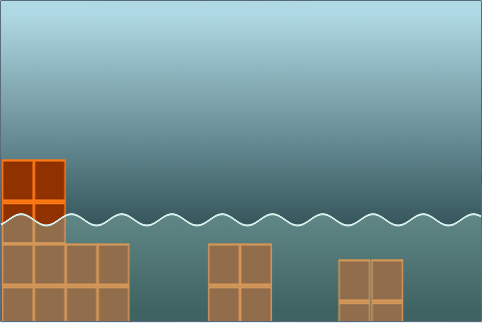
Final output using displacement texture and 0.005 as amplitude for sine wave.

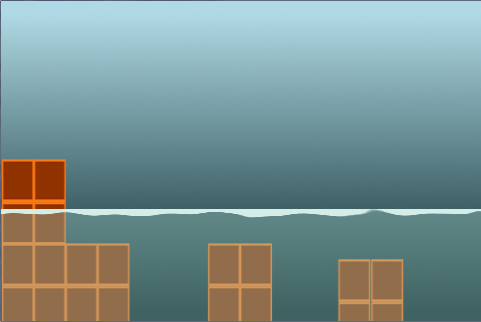
One point to note here is that fragment shaders work inside the area of the mesh/sprite so to get the wavy nature of the water, the texture we added had empty space at the top (around top 10 pixels of water image are blank). So if we want the water which has maybe a fixed top surface we can use an image which does not have empty space at the top. Here is the image of water without the empty space.
This was a way to create water with just a rectangular mesh of 4 vertices using fragment shader. Realistic water can be constructed if we add more vertices to this mesh and add sine wave movement in the different vertices of the mesh.
Source Code:
You can find the full source code of the example implemented in Libgdx (http://libgdx.badlogicgames.com/) here.
Thanks